
Build your own inexpensive, easy, high-performance VHF/AIS antenna
by Barb Peck & Bjarne Hansen 29 Feb 2020 18:27 UTC
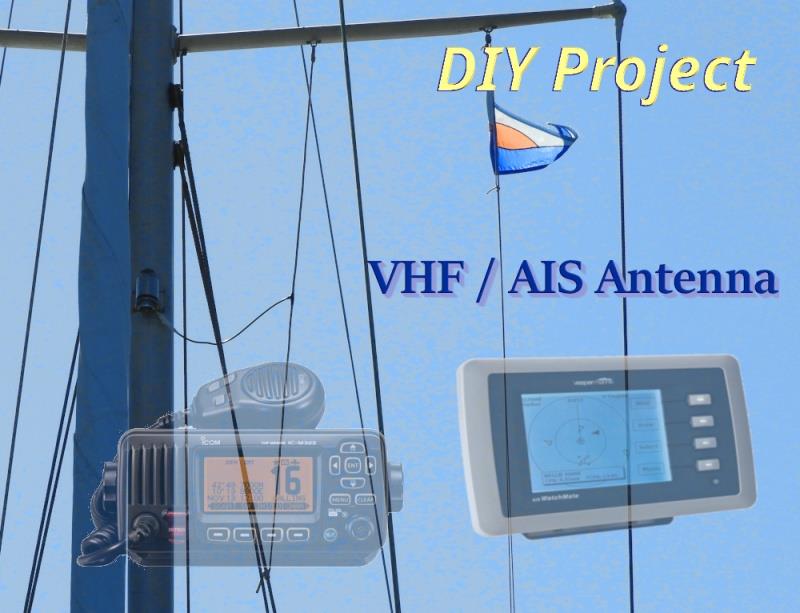
Build your own inexpensive, easy, high-performance VHF/AIS antenna © Barb Peck & Bjarne Hansen
Did I get your attention with 'inexpensive'?... read on to learn why else you might want to build a new VHF or AIS antenna.
You likely already have one antenna, which you use with your regular VHF radio. You may have considered getting a second antenna for use as a backup or with an AIS system. This article describes how to construct your own VHF antenna, using about $10 in parts plus a few hours of labour, and gives some straightforward mounting ideas.
Advantages of separate antennas
The advantages of having a backup are obvious (a frigate bird removed our masthead antenna at Tabuaeran), but it may be less obvious why separate antennas for VHF voice and AIS are useful.
After all, one can buy antenna splitters for sharing a single antenna between your VHF radio and your AIS unit. Some AIS units even include a built-in splitter. However, a separate antenna gives you:
- Redundancy: If you lose your primary antenna, you can connect your second antenna to your VHF and continue talking.
- Simplicity: You only need point-to-point connections (no splicing-in or teeing-off), which is simpler to troubleshoot, and there is no requirement to co-locate the VHF radio and the AIS unit. With fewer failure points, it is less likely that a single fault will disable both your VHF radio and your AIS.
- Higher performance: Separate antennas eliminate a transmit-isolating switch, reduce the number of connections, and minimize the coax length between the antenna and device, all of which retain stronger signals for both your radio and AIS. Finally, with separate antennas you can receive AIS data from other ships while transmitting on your VHF (though you are unlikely to notice this unless you spend a lot of time talking on the radio).
So let's assume you are convinced to get a second VHF/AIS antenna. You can purchase a traditional whip antenna, such as the Shakespeare model 5215 ($85), or you can build your own, following the instructions in this article and it will perform as well as a commercial product.
Let's start with a sprinkling of radio theory to explain the design. You can skip this part if you want, and just hop down to the construction portion. I have included some definitions at the end of this article to help with terminology.
Antenna theory and design
These are the principles upon which an antenna functions:
- a changing current in a conductor generates an electromagnetic field (we call this transmission)
- a changing electromagnetic field generates a current in a conductor (reception)
So, an antenna is really just a conductor, like a wire, which changes electrical current into an electromagnetic field, and vice versa. When used for communication, we call these electromagnetic fields radio waves.
Antennas are most efficient at sending out and capturing radio waves when the antenna's length is matched to specific fractions of the radio wave's length. For marine VHF (frequencies between 156 MHz to 163 MHz), a formula tells us the wavelength is about 1.91 metres.
Many antenna designs exist, each emphasizing some important characteristic such as gain, directivity, polarization, bandwidth, and physical size. A common VHF masthead antenna (such as the Shakespeare mentioned earlier) has a half-wavelength vertical element, which is about 1.91 m / 2 = 96 cm = 38 inches long.
In practice, it will be slightly shorter due to physical properties of the antenna's conductor. Another commonly seen VHF antenna is about 8 feet long and usually mounted on the stern rail; it has more gain than the shorter masthead antenna but is also more directional (i.e. one loses signal strength when heeled over).
The antenna we'll be building will be a half-wave dipole, featuring simple construction, good balance between gain and directionality, and easy mounting.
Antenna construction
The photo of the finished antenna shows it looks like a 'T', with the leg of the T comprised of a short length of coax, and the arms of the T comprised of a longer length of rope.
Inside the rope's hollow core are threaded two lengths of wire. Constructing it is straightforward:
- you measure and cut a length of coax;
- strip the outer insulation from the coax to a measured distance;
- solder a wire in place of the coax braid;
- thread the antenna into the rope;
- and finally attach a connector.
Materials needed
For materials, you will need:
- Approximately 2m of coax, depending on where you mount the antenna. 50-ohm coax types such as RG-58 or CA-195R are suitable and have an easy-to-work-with diameter. Avoid 75-ohm coax, such as used for cable TV applications.
- Approximately 45cm of insulated stranded wire. Tinned copper is preferred. The gauge is not critical: 14 AWG to 18 AWG is easy to handle and has sufficient physical strength.
- A connector for attaching to the longer coax running to your radio / AIS. I suggest a BNC connector or a PL-259: both are available for common coax diameters. Order several extras that you can practice with, if this is the first time you are using a particular model of connector.
- Approximately 2m of hollow-core rope for mounting. It should be large enough diameter that the antenna can be threaded through, but small enough to reduce windage; we used a 12mm diameter scrap of double-braid line with the core pulled out.
- Soldering iron and solder
- Self-amalgamating tape
- 3M4200, Sikaflex, or similar caulking for waterproofing soldered joints
Let's start
First decide on where you want to install the antenna (see the following Mounting section for some ideas). This affects how long you make the antenna's coax tail. You can make it long enough to reach your radio or AIS unit in one unbroken piece, but this might make installation difficult. Instead, I recommend a shorter tail that attaches to a longer run of coax inside the mast.
Our antenna has a 1 metre tail, ending in a BNC connector. This connector attaches near the foredeck light to the coax inside our mast. If you aren't quite decided on where to mount it yet, you can cut the coax longer than you'll need, and trim it later when you put the connector on.
Now we'll construct the antenna from one end of the coax, before inserting it into the rope. Here is the procedure, with photos corresponding to the numbered steps:
1. Cut a piece of coax 50 cm (+/- 1 cm) longer than the length of tail you want.
2. Strip approx 45 cm (+/- 1 cm) of outer jacket off the coax. Start a lengthwise slit in the jacket with a sharp blade. Then while holding the braid + core in one hand, with the other hand pull the jacket sideways. The jacket should split away from the core - if not, use the blade to make a lengthwise score in the outside of the jacket before continuing to pull. Do not worry if the blade cuts a few strands of the coax braid: you will be replacing the braid with an insulated wire later.
3. Separate the braid from the core. One way to do this is to bunch up the braid so the strands open up, revealing the core beneath. A small screwdriver can then be used to fish the core out.
4. Some coax types (e.g. CA-195R) include a foil shield wrapped around the centre conductor. If so, unwrap and remove the foil shield.
5. Cut most of the braid off and discard it, leaving a length of about 2 cm for soldering to
6. Solder 45 cm (+/- 1 cm) of insulated stranded wire to the protruding braid
7. Straighten out the coax core and insulated wire and lay them parallel to a measuring tape. Measuring from the end of the coax jacket, trim both the core and insulated wire to a length of 40.5 cm (+/- 0.2 cm). This is the step that sets the resonant frequency of your antenna to that used by AIS. To optimize the antenna for VHF channel 16 instead, trim the wires to 43.0 cm. If you want a dual-purpose antenna, don't worry, either length will work satisfactorily.
Here's the fun part where the two legs of the antenna are fed into the rope, leaving the tail protruding from the midpoint. Pretty much any length of rope with a hollow core will do, provided the antenna legs fit inside, and there's enough rope left over for tying the antenna straight between two mounting points. I'll describe one way of doing this - I'm sure you can imagine other methods.
8. Locate the midpoint of the rope. Spread the outer braid to expose the core and pull it partway out.
9. Cut the core midway along the protruding loop, and tape each antenna tail to a core end. Box tape or sheathing tape work well.
10. Pull and milk the cores out the ends of the rope, such that they pull the antenna legs into the centre of the rope. Continue pulling until the coax tail of the antenna butts up to the midpoint of the rope.
11. Seal the coax where it enters the rope using 3M4200 or similar caulking. The goal is to prevent water from wicking up into the coax and into the insulated wire, so ensure the spots where bare conductors exit insulation are well saturated with sealant. Applying additional sealant to the rope in the immediate area of the T-junction won't hurt. Before the sealant hardens, pull both the rope and antenna legs taught so a smooth junction is formed. Suspend the rope under moderate tension while the sealant cures.
12. Now the rope cores can be detached from the wire antenna legs, and discarded. Seal the ends of the wires with sealant to prevent water from wicking in. Let the sealant cure then push the ends back into the hollow centre of the rope.
13. Finally, attach a connector to the antenna tail. The actual steps will depend on the type of connector chosen, so follow the manufacturer's recommendations. PL-259 connectors are available in crimp or solder versions, and are low-cost. BNC connectors are smaller, but a bit more complicated to assemble. If this is your first time assembling either type of connector, I suggest practicing using a scrap piece of coax, instead of risking spoiling your nice antenna. Once you are confident of the results, then proceed to install the connector on your antenna.
That's it! Your antenna is finished - pat yourself on the back!
Testing finished antenna
Before going to the effort of mounting your new antenna, spend a few moments testing it. The first test is to use an ohm meter to measure resistance between the two contacts of the connector: it should read as an open circuit. If not, there is most likely a short in the connector, or possibly between the coax braid and centre conductor at the T-junction.
The second test is to connect the antenna to a VHF radio or AIS system and check whether you get reception. Once this works, the final test is to try transmitting, but keep people and sensitive electronics several metres away to reduce RF exposure.
Mounting and connecting
When mounting your antenna, keep in mind these considerations: higher up gives better range; avoiding proximity to other antennas reduces interference; and a shorter coax run to your radio retains more of the wanted signals. You should also keep the antenna legs approximately vertical and spaced away from metal objects, to keep the performance omni-directional in the horizontal plane. Incorporating your antenna inside the rope makes it easy to tie between two mounting points. We mounted ours between a spreader and a shroud, as shown here.
The connection between the antenna tail and the coax running back to your radio should be waterproofed. Wrapping a few layers of self-amalgamating tape around the connectors will do the trick.
Antenna performance
How does this antenna perform? Quite well, as measured both with an antenna analyser and in real-world results.
An antenna analyser (Array Solutions AIM-4170D) measures the resonant frequency of this antenna as 162.02 MHz, which nicely corresponds with the frequencies used by AIS (161.975 MHz and 162.025 MHz). Additional results are shown in this table:
To put these figures into perspective, a 50-foot length of RG-58 cable has about 50% power loss. So, we expect this homemade antenna to perform slightly better than the commercial one for AIS use, and slightly less well at VHF channel 16, but the differences will likely be obscured by losses in the cables leading to the antennas.
For those who are interested, here is the analyser's plot for our antenna between 130 MHz and 180 MHz.
In real-world use, our homemade antenna works great at picking up AIS signals when attached to an SR-161 AIS receiver. Here's a screenshot from our chartplotter, while we were near Bahía Concepción in the Sea of Cortez, showing AIS targets up and down the Baja coast.
Note the two targets south of Puerto Vallarta, over 500 nautical miles away! But wait, you say, VHF is supposed to be line-of-sight... This long-distance reception demonstrates the phenomenon of atmospheric ducting, an interesting topic in itself. Our antenna can't claim all the credit, but certainly works well at nearer targets too.
Definitions and Sources
- Automated Identification System (AIS): A vessel safety system in which periodic broadcasts from equipped vessels (and aids to navigation) of their position, speed, heading, etc, can be received by other vessels. AIS uses two frequencies in the marine VHF band, 161.975 MHz (AIS1) and 162.025 MHz (AIS2).
- Electromagnetic (EM) wave: An oscillating electric and magnetic field that travels through space at the speed of light (which is also an EM wave). The frequency of oscillation determines whether we call it a Radio wave, Light, Infrared radiation, etc.
- Current: A flow of electrons in a conductor. Under the right conditions, this flow results in EM waves and the conductor is then acting like an antenna.
- Coaxial cable: Often abbreviated to coax. Cable consisting of two conductors: a centre wire surrounded by an outer shield. The shield may be comprised of braided strands, or foil, or both. Coax is useful in carrying RF signals because it does not emit much electromagnetic energy.
- Impedance: A measure of the ratio of voltage to current in a conductor. Coax cables used for RF commonly have a 50 ohm impedance. Ideally, any loads attached to a coax cable should have the same impedance, otherwise losses increase.
- Radio Frequency (RF): A frequency in the range used for communications. Generally considered to be from a few kHz to 300 GHz. The RF spectrum is sub-divided into bands with names such as HF, VHF, and UHF.
- Standing Wave Ratio (SWR): The ratio of the highest amplitude voltages to the lowest amplitude voltages along a transmission line. It indicates how well the impedance of a load (e.g. antenna) is matched to the impedance of the transmission line (e.g. coax). A ratio of 1:1 means that the match is exact. Higher ratios result in more reflections and less signal at the load.
- Very High Frequency (VHF): The band of frequencies from 30 MHz to 300 MHz. Marine VHF spans 156 MHz to 163 MHz.
Resources
- Coax cable and connectors can be ordered from RadioWorld in Toronto. Their PL-259 silver-plated connector, part #CON-100S, costs $6. A reducer for RG-58 (fits CA-195R too), part #CON-108, costs $1. They ship quickly and at a reasonable fee.
- CA-195R is sometimes harder to find than RG-58. L-Com usually has it in stock ($0.58US / foot) and will ship to Canadian addresses for about $17US. They also have a good selection of connectors.
- Plenty of videos and articles on assembling connectors are on the internet. You will sometimes find conflicting advice - when in doubt, check whether the cable or connector manufacturer has any specific instructions. Amphenol (a connector manufacturer) has this clear document [PDF].
- Another set of very detailed instructions for PL-259 connectors can be found here.
I hope this article has been useful and inspires you to have fun making and playing with antennas. If you have any questions or comments, I'll be happy to hear from you!
This article has been provided by the courtesy of Bluewater Cruising Association.